VIOLA JOURNAL PAGE 1 |
|||
 |
||
While the varnish dries on the cello, I'll get started with designing a new viola model. I've experimented more with viola form than with the forms of either the violin or cello. Partly, this is due to the inherent characteristics of an instrument whose length can vary anywhere from around 38cm to 43cm. Smaller and larger models than this have been made and are still called violas. A variation of five centimeters is huge, considering that violins never vary more than one centimeter from one another, and cellos usually remain within two or three centimeters. A couple of years ago, I settled upon a form based on a great sounding 1751 C.A. Testore viola that I had in the shop. It measures just over 41cm. I used this model for about half a dozen instruments, experimenting primarily with arching concepts. To offer a smaller sized viola, I designed a form based on a fine Domenico Busan (39cm). My brother, Jethro Marks, principal violist of the NAC orchestra in Ottawa, plays on a large viola made by Helmuth Keller in Philadelphia in the 1950's. It has a wide, powerful sound that I find very attractive. I built a few instruments based off of this 42cm model, but found myself missing the elegant proportions of Italian instruments. This brought me to grandfather Guarneri and his 1672 Conte Vitale viola. William Primrose, Pinchas Zukerman and Nabuko Imai all use Andrea Guarneri violas of this model. The problem with using this instrument as a model lies in it's exceeding asymmetry. I'm sure his form was close to symmetric, but less than identically cut blocks and inaccurately bent ribs are what give so many Italian instruments their distinct character. In any case, if one draws a line down the center of the Conte Vitale and mirrors either side, one comes up with two very different looking symmetric instruments, neither of which look very Cremonese. Designing asymmetries into the form itself to recreate "mistakes" made by previous makers goes against my sense of craftsmanship, so I tried to distill from a few different Andreas Guarneri violas a form that encompasses the underlying concepts of them all. This was my most recent viola form, upon which I have only made one viola, yet I'm already ready to move on to a new form. Why so soon? The model looked weak and pinched in the bouts moving into the corners. It was missing a certain squareness and breadth in it's stance and I felt that I could hear this constriction in it's voice. The form hadn't been designed from an underlying concept, instead, it had been constrained by my attempt to make it fit into all those different Guarneri violas. Anyway, enough about forms. Suffice to say that finding a viola model is a process and that I feel inspired to create a bold new form that includes all the best qualities of my previous efforts. |
||
 |
||||||
 |
||||||
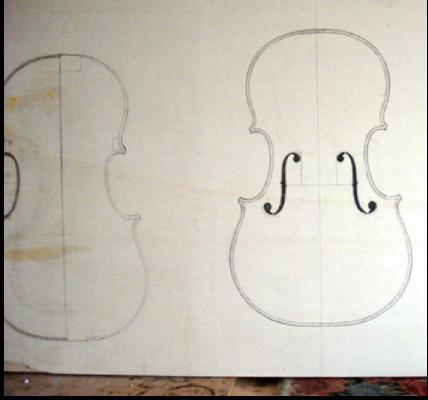
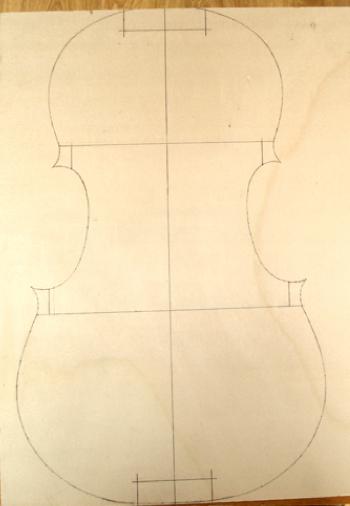
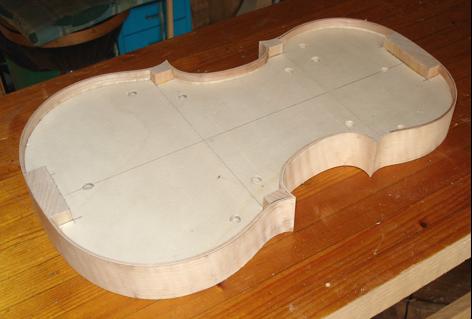
Two glimpses into the design process. It will be a relatively large viola, 42cm. Full upper and lower bouts, vertical c-bouts, manageable body stop of 22cm, full 4cm rib-height, Amati inspired f-holes. I'm getting excited to hear it already. |
||||||
 |
|||||||||||||
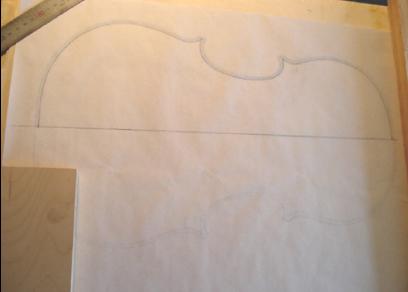
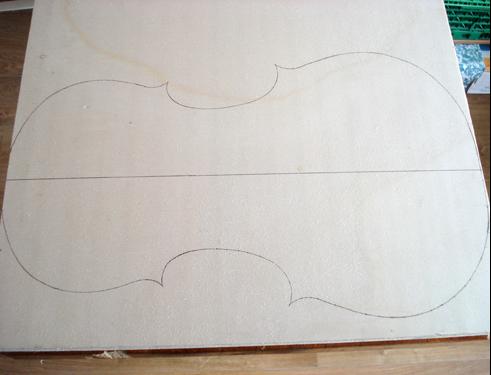
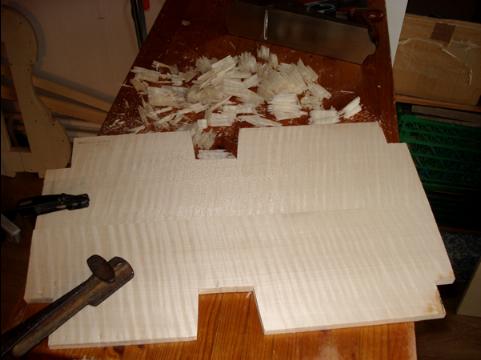
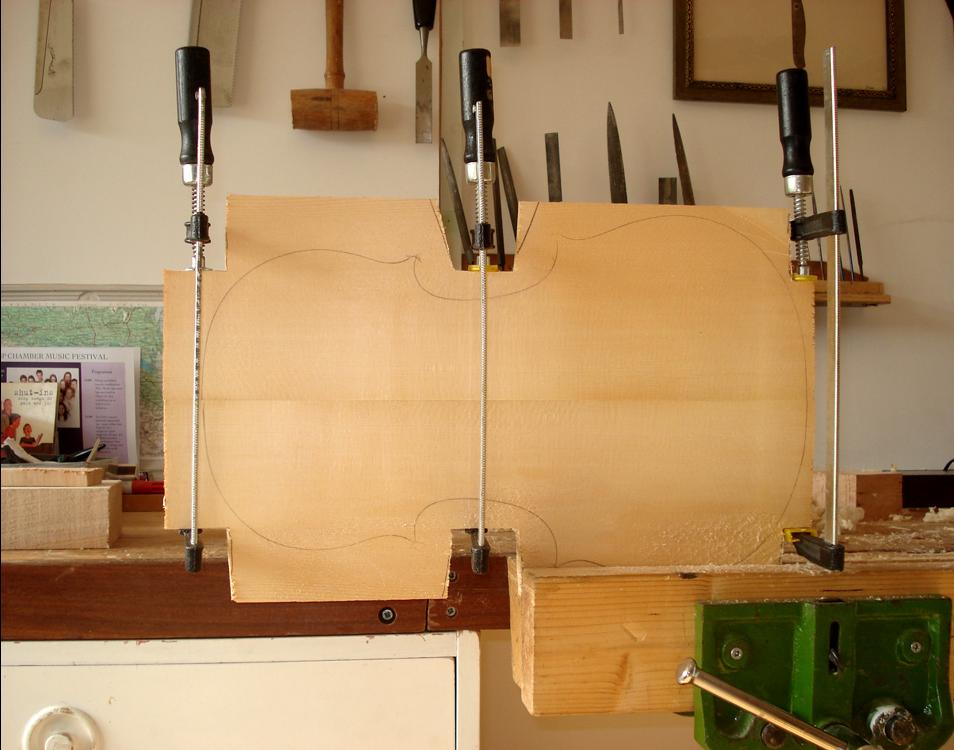
Here I've transferred the design onto a board of poplar multi-plex. When cut out, this will be the mould around which I'll bend the viola's ribs. Sorry about the distorted perspective due to hasty camera-work.... |
|||||||||||||
 |
|||||||||||||
 |
|||||||||||||
 |
||||||||||
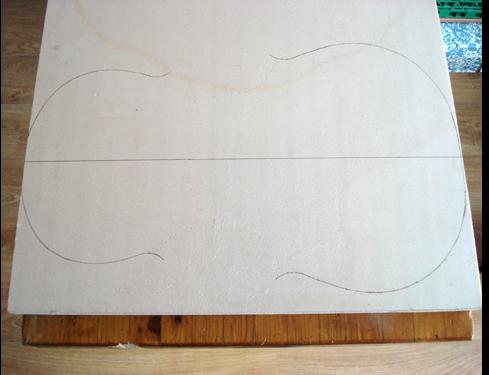
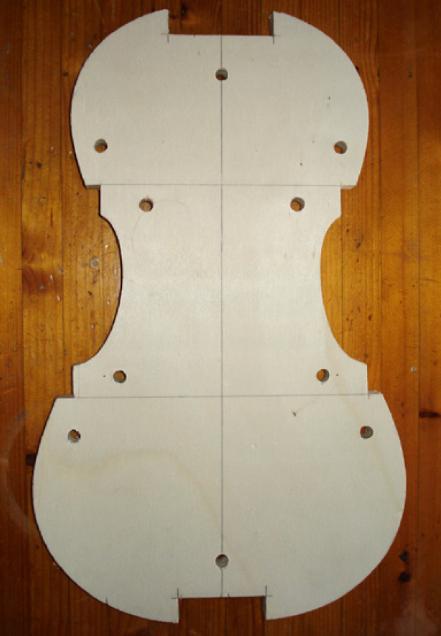
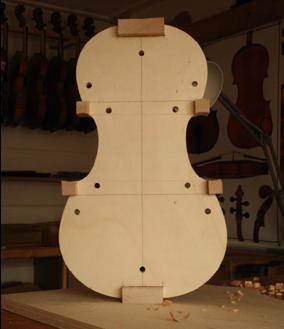
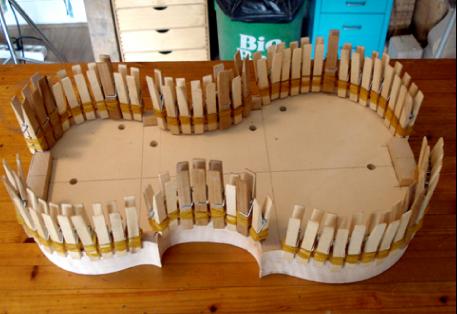
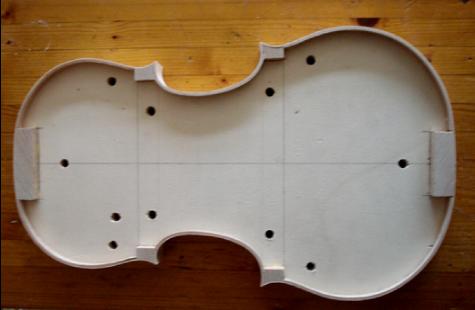
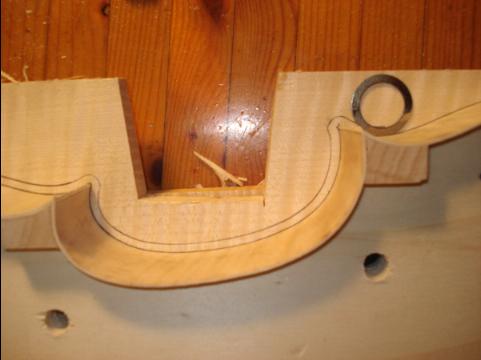
The finished mould(still slightly distorted due to the photograph.....). In reality, it's quite symmetrical. Now, let's see what it can do! |
||||||||||
 |
||||||
 |
||||||
 |
||||||
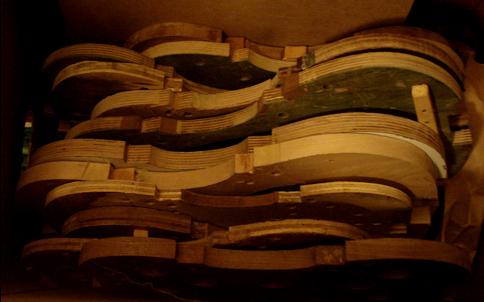
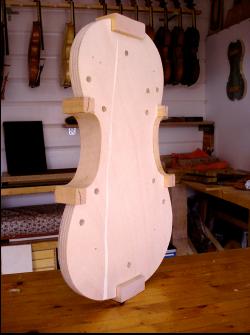
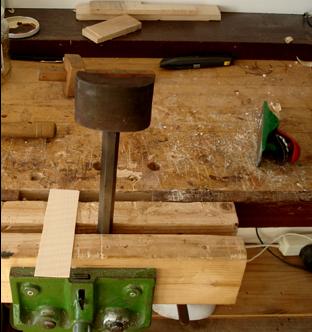
How I do enjoy the initial steps in the process, when every decision has a defining affect on the instrument's underlying character. I already have a concept of the arching that I'll be giving to the top and back plates so that I know how deep my blocks(and consequently ribs) should be. While the willow blocks are gluing onto the mould, I go through my wood supply and select pieces for the back and ribs. In contrast to the poplar cello I've just finished, this viola will use maple with a strong, even flame. The back promises to be one of the most exciting pieces I've ever worked with, Now I return to the bench and carve just the inner surfaces of the corner blocks, thus outlining the shape of the c-bouts. I place the cast-iron rib-bending form on an electric hotplate and as it heats up, I plane the rib stock down to just over 1mm thickness with a toothed plane. When the rib-iron is hot enough to evaporate a drop of water upon contact, I move it into my bench vice. The ribs are brushed lightly with water before being steam-bent around the rib-iron. I glue them onto the blocks using a dowel clamp and counterform system that I'll take a photo of when I attach the upper and lower bouts. |
||
 |
||||||||||||
 |
||||||||||||
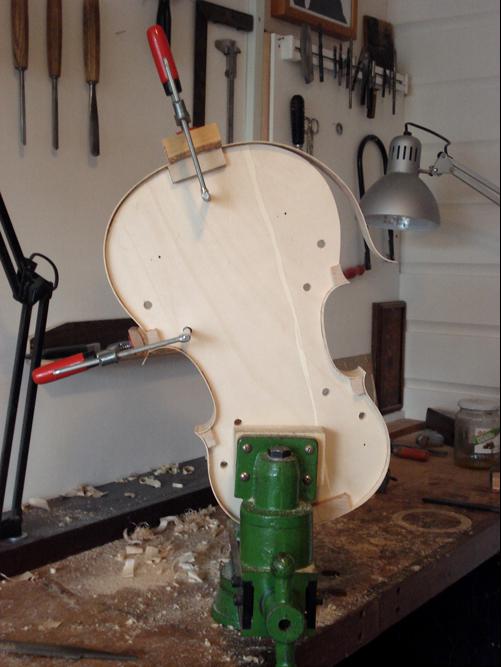
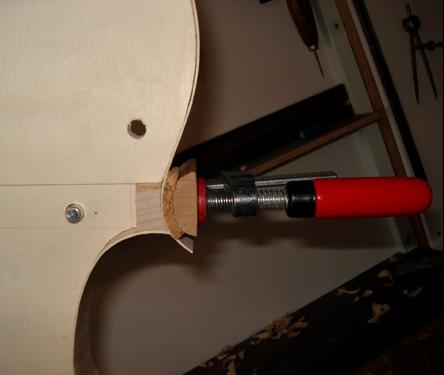
The outsides of the corner blocks as well as both the top and bottom blocks have been shaped to follow the mould's curves. The upper-bout ribs are already glued onto their blocks and the lower blocks are in the process of being clamped. In the close-up you can see the system of clamping to which I've evolved after trying many over the years. This is about as quick and effective a system as I can imagine. Once the glue dries, I'll trim flush the over-extended ribs at the corners. |
||||||||||||
 |
||||
 |
||||
 |
||||
 |
||||
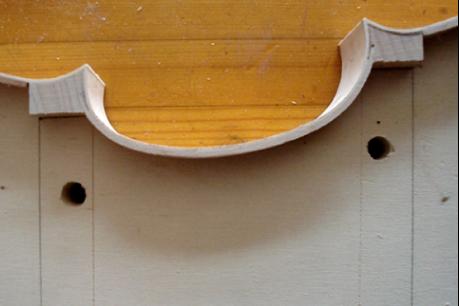
The basic rib structure is now complete. 2mm thick strips of willow "linings" have been glued around the upper edge of each rib for strength and to increase the surface area for gluing on the back. The c-bout linings are morticed into the corner blocks to avoid springing loose. Next, the back. |
||
 |
||||
 |
||||
 |
||||||||||
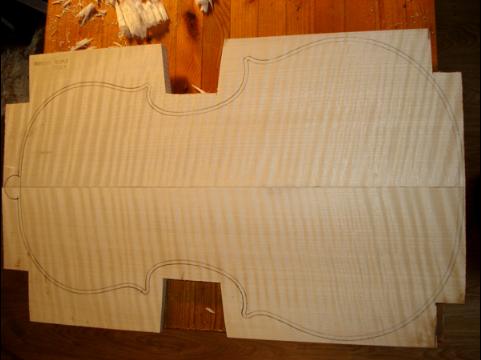
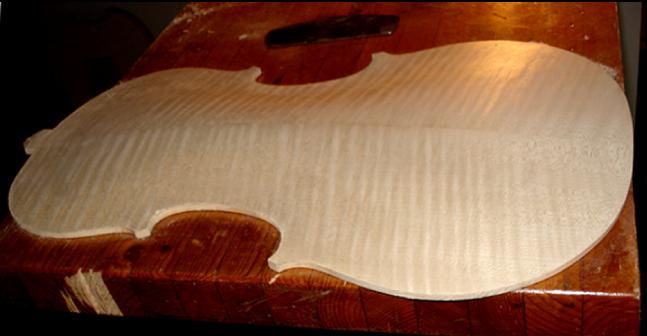
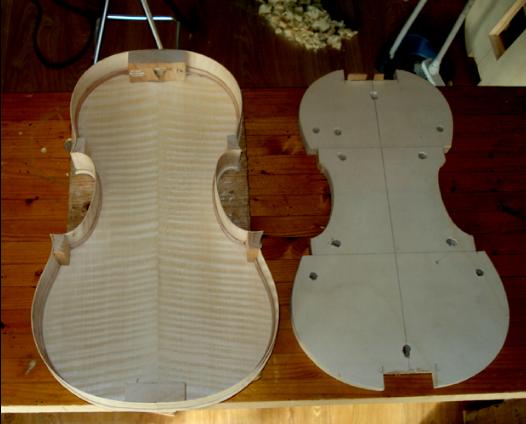
It's too bad I don't have a photo of the maple wedge for the back before it was split down the middle and the two halves were glued together in a "bookmatched" manner. As you can see, it's a spectacular piece of wood. The flames, neither too wide or narrow, and evenly spaced throughout the entire 45cm length come very close to my ideal for maple. Once the underside has been planed completely flat, I place the rib structure on top and trace around it with a 3mm ring washer as a spacer. When the ribs are lifted, I get my first glimpse of the regal character this viola's back will have. |
||||||||||
 |
||||||||||||||||
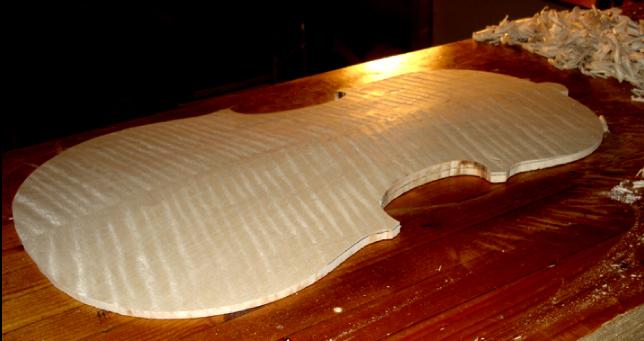
I've cut the back to the outline of the rib structure plus a 3mm overhang and then begin sculpting the arching of the upper and lower bouts using a flat-bottomed plane. I used to work more with gouges but now find that I can create a larger concept in the arching with a palm sized hand-plane. You can see in the top photo that I've left the arching across the c-bouts for last. I'll sculpt that area with a wide radius gouge. Below, the entire arching is nearly complete. The metal scraper in the background is used to smoothly connect the arches of the bouts with the central arch and also to flatten an area just inside of the edge where the purfling will be. A low, even arching, full to the edges is the goal. I believe this to be ideal for both strength and flexibility. |
||||||||||||||||
 |
||||||||||||||||
 |
||||||||||||||||
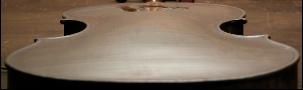
Guarneri del Gesu back arching |
||||||||||||||||
 |
||||
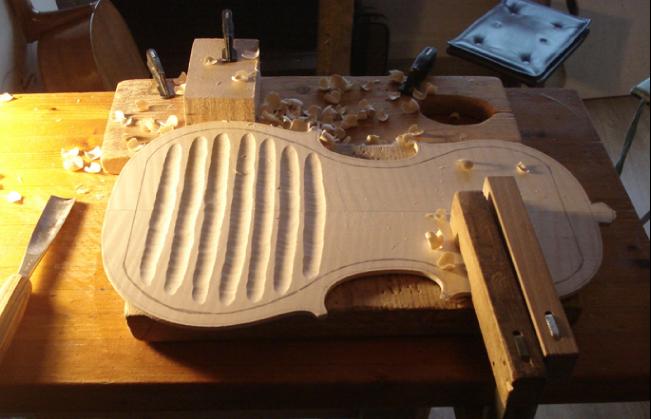
When I'm satisfied with the flow of the arching over the back, I flip it over and begin the process of hollowing out the inside. I've found that scooping across the maple's grain in channels affords me the most depth control. I also find it easier on the wrists to plow ahead of broken ground. You can see the gouge I use to the left of the plate. I've used this gouge for all of my fifty odd instruments and I wonder at the impressive mountain of chips it must have produced in it's working life so far. I keep on intending to build a special cradle to clamp the plate in while doing this work, but end up always finding quick and effective improvised clamping solutions like the one you see here.... |
||||
 |
||||||||||
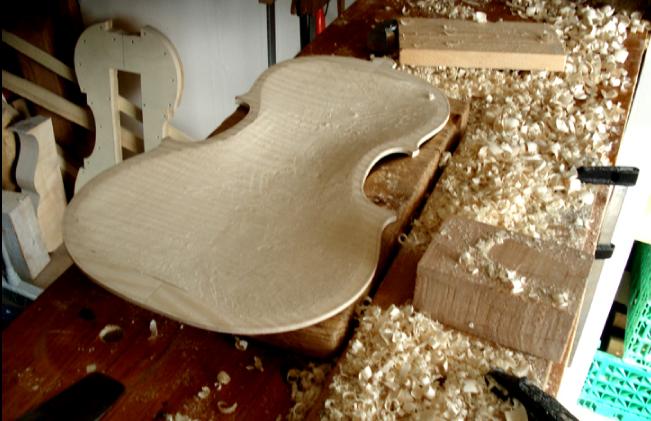
After I've "plowed" across the entire back a few times with the gouge it's time to refine the lay of the land with a round-bottomed toothed aluminum plane(not visible). At this point the back is around 5mm thick everywhere. |
||||||||||
 |
||||
 |
||||
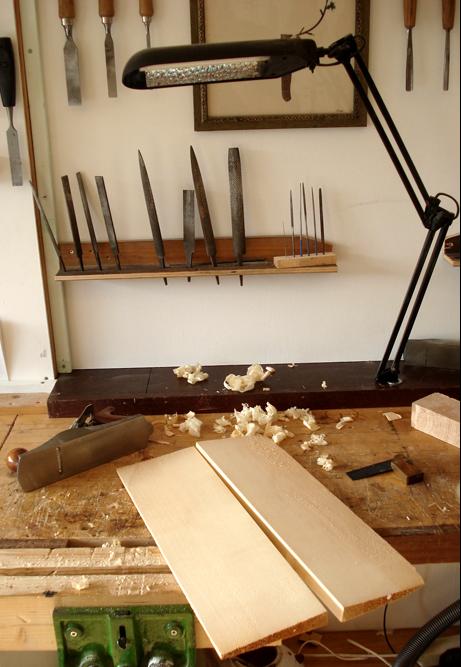
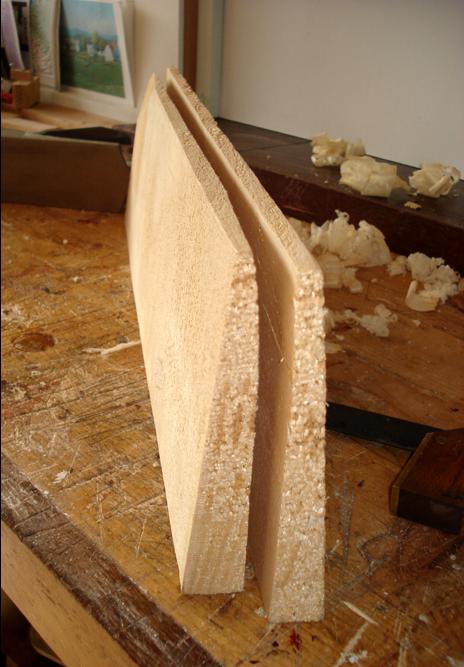
Here is the wedge of spruce that will become the viola's top. The two pieces on the left have just been split from one another. The wider section(touching the workbench), grew closer to the outside of the tree, nearer the bark, where the year rings are closest to each other. As the cone narrows, the wood comes from areas closer to the heart of the tree, where the year rings are slightly wider apart. This means that when the two halves are joined in the manner you see on the right, the year rings, mirroring each other, will be close together at the centrer and then get wider apart as they approach the edges. This can be useful tohelp assure that the critical area in the center of the plate (between the f-holes), will be sufficiently stiff. Assuming other factors are consistent: closer year rings = stiffer wood. |
||
 |
||
Joining two-piece tops and backs is truly an acquired skill. I remember that it took hours (if not most of the day!) to get the two halves to fit just right on my first few instruments. Now it doesn't take much more than 15 minutes. |
||
 |
||||
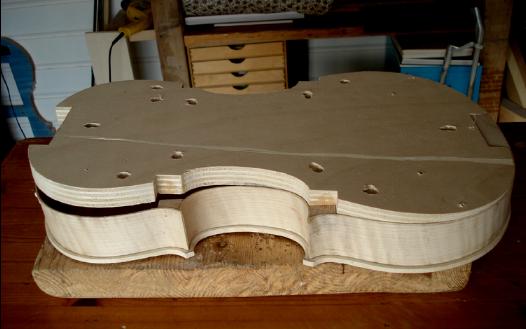
The mould has served it's purpose and now needs to be removed. A give each block a no-nonsense tap with a hammer to break it's light glue-bond with the mould. Once all the blocks are free, I begin to shimmy the mould upward and out of the rib structure. |
||||
 |
||||||||||
The beauty of using an internal mould based process is that the mould can be re-used to reproduce successful models, or modified to experiment for improvement. At this point I could already start gluing blocks onto it again to get started on another viola. As this is a new model for me, I'll first want to hear the results of this viola before starting another on this model. So, I'll hang up the mould for the time being and concentrate on making the top. |
||||||||||